I did a lot of research before buying a bike rack for my car. I looked at sevaral brands. I looked at on-top-of-the-car versions. I looked at hitch-mounted racks. At the end of the day I went with a
Yakima hitch-mounted rack for several reasons:
- It didn't touch the car
- It wouldn't scratch the paint
- I wouldn't scratch the car loading bikes
- Better aerodynamics
- No bug funk on my bike
- And Yakima has served me well for nearly 20 years.
Anyway, this is how it looked on the car...
It hauls two bikes, yada, yada... But the reality is that it's usually just me. So in the interest of saving a little weight, I took off one of the bike holders. This is how that looked...
When I am going cycling with a friend, I simply bolt the other bike holder on with two bolts. Obviously it works, but it's ugly. More importantly, I could not open the hatch without lowering the rack, because the hatch would hit the rack...
Obviously that's a pain in the ass having to lower the rack every time I wanted to get into the back... I thought of just cutting off the top, but then I could only haul one bike. So I thought about it for a little longer and came up with a solution... I purchased the following spare parts from Yakima:
- RPL, SPINE ASSY, HOLDUP part number 8890201. $60.
- RPL, MTG HDW HOLDUP +2. $5
These are part of
Yakima's Holdup Plus 2... an extension that allows you to add two additional bikes to the rack using the 2" receiver.
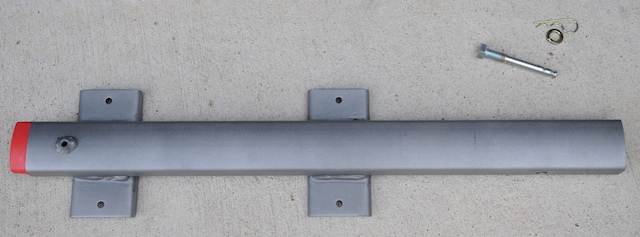
It slides into the spine of my rack and secures tightly using the bolt shown above. Basically my plan was to convert my rack to a single-bike rack and use the spine from the Plus 2 to add the second bike holder for a two-bike configuration. The first thing was to measure where to cut my rack. I cut it in such a way to stop the arm from flopping all the way over and still allow me to open my hatch without lowering the rack...
The next thing I did was design it in such a way to increase the distance between two bikes by about 2". The reason is that when my teammate and I load our mountain bikes, the handlebars and seats interfere with one another. The additional 2" between the bikes will stop this problem...
So after a whole lot of measuring, cutting and drilling, the following is the completed product... The first set of pictures show the single bike version of the rack...
Note how I can now open the hatch without lowering the rack? WOO HOO!!!
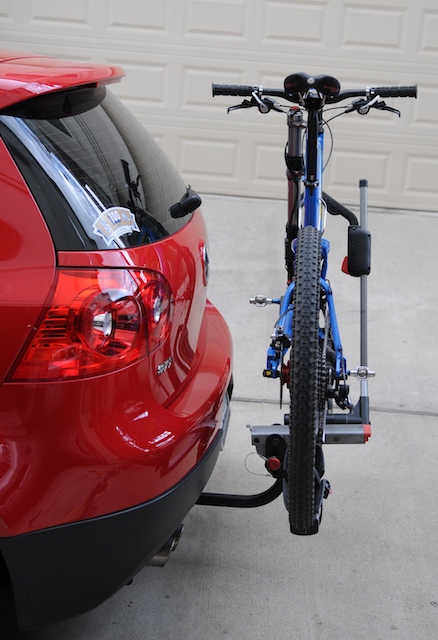
Here's the rack with a bike loaded on it...
This is the other bike holder mounted to the Holdup Plus spine I modified...
When I want to add the ability to carry a second bike, I just pop out the red cap...
... and slide the smaller spine inside the larger one and use the bolt to secure them together like so...
And it folds up just as it did before...
Hope you find this useful.


Very informative post.
ReplyDeleteThank you for sharing excellent informations. Your web-site is very cool.
ReplyDelete